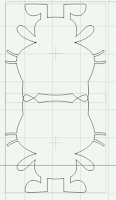
This is an example of a card the opens from the bottom.

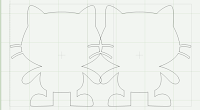
This is an example of a card the opens from the side.
Now place the image on your mat.
Next copy and paste the image so you have two images directly on top of each other that are identical in shape and size.
While the second image is still selected check off the flip option.
If you want the card to open on the side grab the arrow button on the image that slides it horizontally and move the top image over until the two are overlapping slightly in at least two spots.
If you would like to have the card open from the bottom you will need to rotate one of the images 180 degrees. You can do this by clicking the "Turn" button twice. Now grab the arrow button on the image that slides it vertically and slide it down until the heads are overlapping just slightly.
Next choose each image and select the "Weld" feature for both of them.
The last step is to cut it out on your Cricut machine of choice!

No comments:
Post a Comment